To deep clean your kitchen, start by decluttering surfaces and focusing on high-touch areas like countertops and appliances. Use eco-friendly cleaners, microfiber cloths, and scrubbing tools for effective results. In the bathroom, tackle soap scum with a vinegar and baking soda paste, and guarantee proper ventilation to prevent mold. For your bedroom, assess your items and implement a “one in, one out” rule to maintain order. Regular dusting and vacuuming can help keep allergens at bay. If you keep these tips in mind, you’ll find even more strategies to create a sparkling home.
KEY TAKEAWAYS
- Gather eco-friendly cleaning supplies and organize them for easy access before starting the deep cleaning process in any room.
- Systematically clean high surfaces first, then tackle countertops and floors, ensuring thoroughness in all areas.
- For bathrooms, use natural remedies like vinegar and baking soda to effectively remove soap scum and maintain cleanliness.
- Regularly declutter and organize items in bedrooms to create a serene environment and prevent mess accumulation.
- Establish a routine for deep cleaning every few months, focusing on high-traffic areas and often neglected spots to maintain hygiene.
ESSENTIAL KITCHEN CLEANING SUPPLIES
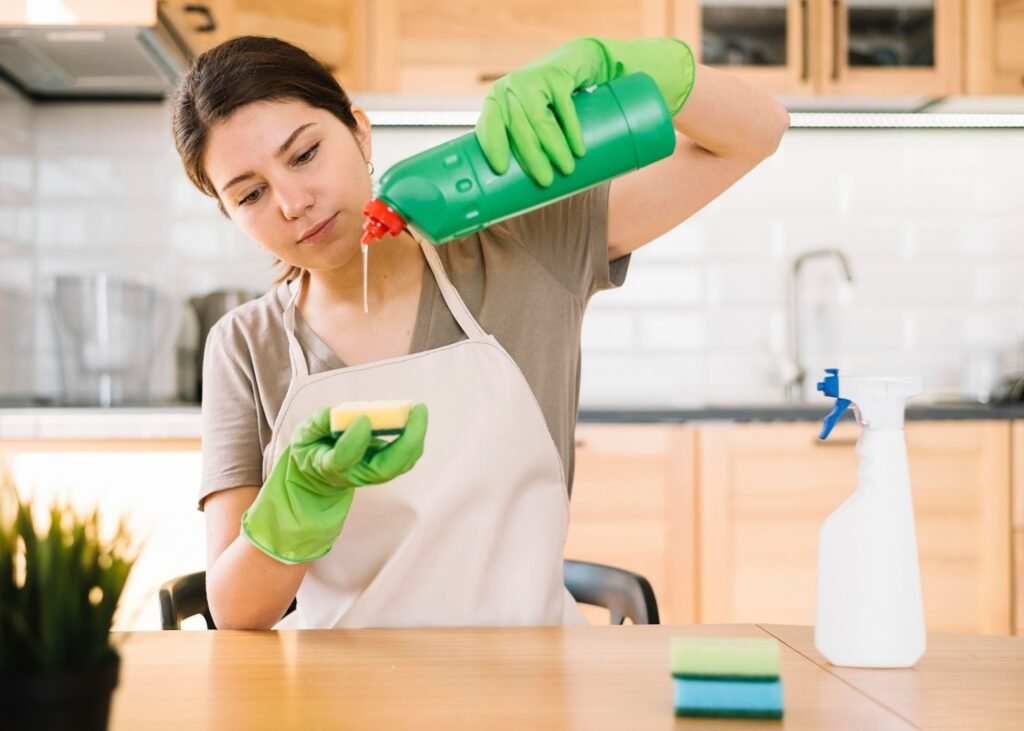
When it comes to deep cleaning your kitchen, having the right supplies on hand makes all the difference. You want tools that not only tackle grime but also align with your values, like eco-friendly cleaners. These environmentally conscious options are safe for your home and the planet, allowing you to clean without guilt. Look for all-purpose cleaners, vinegar, baking soda, and essential oils; they’re effective and versatile.
Next, consider your cleaning tools. Microfiber cloths are a must. They trap dirt and dust better than traditional rags, and you can wash and reuse them, promoting kitchen organization while reducing waste. A sturdy scrub brush and a good sponge can handle tougher messes, ensuring you’ve got everything you need.
Don’t forget about storage solutions. To keep your cleaning supplies organized and easily accessible, invest in a caddy or a designated shelf. This way, you won’t waste time searching for what you need when you’re ready to jump into cleaning. Prepare to clean so you don’t waste time or resources by accident. Gather your cleaning products. Read the directions so you know you are using them safely and effectively. The label contains important information about how much product you should use to get the best results. Following the instructions on the label will help prevent you from wasting the product. Make sure they are not within reach of children when stored or while you’re cleaning. Also gather cleaning tools, like paper towels or microfiber cloths.
Lastly, keep a checklist handy. Note which supplies you have and what you might need to restock. This not only streamlines your cleaning process but also empowers you to maintain a clean, organized kitchen effortlessly.
With the right supplies and a little planning, you’ll enjoy the freedom that comes from a sparkling, organized kitchen, ready for whatever culinary adventures await!
Step-by-Step Kitchen Deep Clean
To start your kitchen deep clean, gather all your cleaning supplies so you’re ready to tackle the task ahead. Tackle large, hard-to-reach surfaces in this order: ceiling, ceiling trim, ceiling light fixtures (including bulbs), walls, the rest of the trim, and baseboards. The best tools for these surfaces are clean microfiber mops, dusters with a telescoping handles, or sanitizing cleaning wipes. Bonus: These tools are typically thin enough to get behind the sofa without moving it. Above eye-level, a spritz of water is all you need on the mop. Surfaces closer to the floor tend to build up dirt and dust, so use warm water mixed with a drop of dish soap. In bathrooms, add a splash of white vinegar to the mixture to stop mold and mildew. For spots where using a mop is awkward or inconvenient, use a microfiber cleaning cloth. Rinse often and wring thoroughly.
A systematic cleaning process will help you stay organized and guarantee you don’t miss any areas.
Let’s break it down into manageable steps for a sparkling kitchen.
Gather Cleaning Supplies
Gathering cleaning supplies is essential for an effective kitchen deep clean. You’ll want to choose eco-friendly products that are safe for your family and the environment. Additionally, having proper storage solutions for your cleaning supplies can help keep everything organized and easily accessible. Here’s a quick table to guide you on what supplies to gather:
| Cleaning Supplies | Purpose | Eco-Friendly Option |
| All-purpose cleaner | General surface cleaning | Vinegar and water mix |
| Dish soap | Grease removal | Biodegradable dish soap |
| Scrub brushes | Tough stains and grime | Natural fiber brushes |
| Microfiber cloths | Dusting and polishing | Reusable microfiber cloths |
| Baking soda | Odor neutralizer | Non-toxic baking soda |
Once you have your supplies ready, you’ll feel more empowered to tackle the deep clean. Remember, using eco-friendly products not only benefits your kitchen but also contributes to a healthier planet. Organize your cleaning supplies in a handy storage solution, so you can effortlessly grab what you need when you need it. Happy cleaning!
Systematic Cleaning Process
A systematic cleaning process can transform your kitchen into a spotless space in no time. Start by creating a cleaning schedule that fits your lifestyle. Establishing a simple weekly house cleaning checklist can help you stay consistent with your weekly routines and prevent dirt and clutter from building up over time. Break the tasks into manageable chunks, focusing on priority areas like countertops, appliances, and floors.
Begin with decluttering. Remove everything from surfaces and sort items into keep, toss, or donate piles.
Next, tackle the high surfaces such as cabinets and shelves. Dust and wipe them down before moving on to your appliances. Don’t forget to clean the inside of your microwave, oven, and refrigerator—these often-overlooked spots can harbor grime.
Once the appliances are clean, shift your attention to countertops and sinks. Use a suitable cleaner to disinfect and remove any stains.
Afterward, sweep or vacuum the floor, followed by mopping for that extra shine.
Lastly, take a moment to check your cleaning supplies and restock as needed. This systematic approach not only keeps your kitchen clean but also makes the process less overwhelming.
Tackling Bathroom Soap Scum
Soap scum can be a persistent nuisance in your bathroom, but with the right approach, you can tackle it effectively. By using a few natural remedies and implementing some preventative measures, you can keep soap scum at bay and maintain a clean, inviting space.
First, consider these natural remedies to combat soap scum:
- Vinegar and Baking Soda: Mix vinegar with baking soda to create a powerful paste. Apply it to affected areas, let it sit for 15-20 minutes, and scrub away the grime.
- Lemon Juice: The acidity of lemon juice helps break down soap scum. Apply it directly to the scum, let it sit, then wipe clean.
- Borax: Sprinkle borax on damp surfaces, scrub with a brush, and rinse. It’s a natural abrasive that helps lift soap scum without harsh chemicals.
To prevent soap scum from building up in the first place, consider these preventative measures:
- Squeegee After Use: Keep a squeegee in your shower. After each use, give your tiles and glass a quick wipe down to remove excess water.
- Use Liquid Soap: Opt for liquid soap instead of bar soap, as it tends to leave less residue behind.
- Regular Cleaning Schedule: Set a regular cleaning schedule to tackle soap scum and other bathroom grime before they become a problem.
Deep Cleaning Your Shower and Tub
To effectively deep clean your shower and tub, you’ll need a few essential cleaning supplies on hand. Deep cleaning a home means doing more to remove dirt, grime, and clutter than is done during a regular cleaning session. A great comparison is having your teeth cleaned at the dentist’s office versus daily toothbrushing. Deep cleaning of a home is thorough and involves cleaning every room surface from top to bottom.
Follow a straightforward step-by-step process to tackle soap scum, grime, and hard water stains.

ESSENTIAL CLEANING SUPPLIES
When diving into deep cleaning your shower and tub, having the right supplies on hand is essential for achieving sparkling results.
You’ll want to gather tools and products that not only tackle grime effectively but also promote a healthier environment. Here’s a quick list of must-haves:
- Eco-friendly cleaning products: Opt for plant-based cleaners that are tough on soap scum but gentle on the planet.
- Scrub brushes and sponges: A variety of textures will help you reach every nook and cranny.
- Microfiber cloths: These are perfect for drying surfaces without leaving streaks.
Creating a cleaning checklist can streamline your efforts, ensuring you don’t overlook any area.
As you gather your supplies, consider the type of cleaning you prefer—whether it’s a commercial solution or DIY concoction. Embracing eco-friendly products not only protects your health but also gives you freedom from harsh chemicals.
You can deep clean your shower and tub with confidence, knowing you’ve chosen the best tools for the job. With the right supplies, you’ll transform your space into a fresh and inviting oasis.
Step-by-Step Process
Starting with a quick rinse can help loosen dirt and soap scum before you plunge into the deep cleaning process. Here’s how to tackle your shower and tub effectively, using eco-friendly products for a healthier space.
- Rinse the surfaces to remove loose debris.
- Apply an eco-friendly cleaner to the walls and tub. Let it sit for 10-15 minutes to break down grime.
- Scrub with a non-abrasive sponge to avoid scratching. Focus on grout lines and corners.
- Rinse thoroughly with hot water, ensuring no cleaner residue remains.
- Dry the surfaces with a microfiber cloth to prevent water spots.
For a more organized approach, consider seasonal cleaning. Here’s a simple table to keep track:
| Task | Frequency |
| Deep clean shower | Every 3 months |
| Clean tub | Monthly |
| Check for mold | Every 2 months |
| Replace shower liner | As needed |
| Stock eco-friendly supplies | Monthly |
Maintenance Tips
Maintaining a clean shower and tub requires regular attention and a few simple habits to keep dirt and grime at bay. By incorporating these practices into your routine, you’ll enjoy bathroom freshness and a more inviting space.
- Squeegee After Each Use: Quickly wipe down the walls and floor with a squeegee to prevent soap scum and mildew buildup.
- Use a Daily Shower Cleaner: Spraying a non-toxic cleaner after each shower can help maintain cleanliness without heavy scrubbing later.
- Declutter: Keep your tub area organized by only storing essential items. This promotes both kitchen organization and a serene bathroom environment.
Set aside a few minutes each week for deeper cleaning. Scrub the tub and tiles with a brush and a suitable cleaner to tackle any stubborn stains.
Don’t forget to check for any mold or mildew, as addressing issues early keeps them from growing into bigger problems.
Organizing and Decluttering Bedrooms
Transforming your bedroom into an organized and clutter-free sanctuary can greatly improve your overall well-being. Start by diving into effective bedroom organization practices.
Begin with a thorough assessment of your space. Take everything out of your closet and drawers, and categorize items into keep, donate, and discard piles. This simple decluttering strategy not only frees up space but also lifts your spirits. Applying simple minimalist decluttering tips, like categorizing items into keep, donate, and discard piles, makes it easier to maintain a peaceful and organized bedroom.
Next, embrace the “one in, one out” rule. For every new item you bring into your bedroom, let go of something else. This helps maintain the balance you’ve worked hard to achieve.
Consider investing in storage solutions that complement your style—think decorative bins, under-bed storage, or drawer organizers. These tools can aid in keeping your belongings tidy and easily accessible.
When organizing, think vertically. Use shelves and wall-mounted racks to maximize your space. This approach allows you to showcase your favorite items while keeping the floor clear.
Also, designate specific areas for essentials like books, accessories, and clothing to prevent chaos.
Regularly revisit your organization system. Set aside time each month to reassess your belongings and adjust as needed. This ongoing commitment to decluttering guarantees your sanctuary remains a peaceful retreat.
Effective Dusting and Vacuuming Tips
When it comes to keeping your space fresh and inviting, effective dusting and vacuuming are essential practices. By using the right techniques and tools, you can create a clean environment without relying on harsh chemicals. Embrace eco-friendly products to maintain your space while caring for the planet.
Begin your dusting routine with the following techniques:
- Top to Bottom: Always start dusting from the highest surfaces, like shelves and light fixtures, and work your way down. This prevents dust from settling on already cleaned areas.
- Use Microfiber Cloths: These are excellent for trapping dust and reducing allergens. You can dampen them slightly with water or an eco-friendly cleaner for better results.
- Don’t Forget the Nooks and Crannies: Use an extendable duster or a cotton swab for hard-to-reach areas. Dust can accumulate in places like ceiling fans, baseboards, and behind furniture.
Once you’ve dusted, it’s time to vacuum. Choose a vacuum cleaner with a HEPA filter to capture fine particles and allergens.
Make sure to vacuum high-traffic areas and under furniture regularly. Remember to switch attachments for upholstery and corners, ensuring you don’t miss any dirt.
Maintaining Clean Spaces Regularly
A clean space not only looks good but also promotes a healthier lifestyle. To maintain that cleanliness, it’s essential to implement consistent habits. Establishing weekly routines can help you stay on top of your cleaning game without feeling overwhelmed. Decide on a specific day each week for your deep cleaning tasks, and stick to it. This way, you won’t let messes accumulate over time.
Creating cleaning checklists can also enhance your efficiency. Break down tasks by room, and include everything from dusting surfaces to scrubbing floors. For example, in the kitchen, your checklist might include wiping down countertops, cleaning appliances, and mopping the floor. In the bathroom, don’t forget to disinfect sinks and toilets. By having a checklist, you’ll guarantee that no corner is overlooked, allowing for a thorough clean.
Another tip to maintain your space is to declutter regularly. Set aside a few minutes each day to put things back in their place, toss out expired items, or donate what you no longer need. This simple practice not only keeps your environment tidy but can also turn cleaning into a calming self care activity that supports your overall well-being.
Lastly, involve everyone in your household. Assign different tasks to family members or roommates, turning cleaning into a shared responsibility. This way, you’re not shouldering the burden alone, and the space remains inviting for all.
With these strategies, you’ll find that maintaining clean spaces can be straightforward and liberating.
RELATED STUDIES ABOUT DEEP CLEANING TIPS
As you wrap up your deep cleaning journey, remember that a sparkling home is like a refreshing change, lifting your spirits and rejuvenating your space. With these tips, you’re not just tidying up; you’re crafting a sanctuary. Embrace the rhythm of regular maintenance, turning cleaning into a rewarding habit. Your kitchen, bathroom, and bedroom will shine like beacons of comfort, inviting you to relax and enjoy the harmony of a well-kept home.
A Preliminary Study of Using Greener Materials Including Deep Eutectic Solvents (DESs) for the Cleaning of Silver Tarnish
Objective
This study investigates environmentally sustainable alternatives to conventional silver cleaning methods by testing greener materials—including deep eutectic solvents (DESs), sodium glycinate, EDDS, and saponin—for the removal of tarnish from sterling and pure silver.
Key Findings
- Limited Effectiveness of Simple Complexing Agents
- Aqueous solutions of sodium glycinate, EDDS, and saponin—applied via Evolon® microfilament tissues or agar gels—showed no substantial cleaning effects on artificially tarnished silver, even with extended application times. This is attributed to their preferential complexation of copper ions over silver ions and the short tissue application time (15 minutes).
- Two-Step Method Shows Promise for Heavy Tarnish
- A two-step approach proved effective for removing heavy tarnish:
- Step 1 (Tarnish Alteration): Oxidative DESs (e.g., FeCl₃·6H₂O:EG) transformed tarnish compounds (Ag–Cu–S and Ag₂S) into silver chloride (AgCl) , which has lower lattice energy and is more soluble.
- Step 2 (Removal): A sodium glycinate-based suspension successfully removed the altered tarnish via complexation.
- Raman spectroscopy confirmed the transformation to AgCl, and FTIR suggested glycinate-silver interactions.
- Surface Quality Concerns
- The two-step method caused noticeable surface roughening (confirmed by interferometry and SEM), with Sa values ~3× higher than untreated controls, and a whitish appearance due to increased diffuse light reflection.
- In contrast, a custom slurry (sodium glycinate + citric acid + glycerol + water) applied via cotton swabbing produced the best aesthetic results, with minimal surface alteration, no visible scratches, and color values closest to untarnished silver.
- Comparison with Commercial Product
- A commercial silver polish (Hagerty cream) cleaned efficiently but caused visible scratches and an over-polished appearance, and reduced surface height features.
- The two-step method resulted in the highest material loss (0.15 wt%), while the slurry and commercial cream showed similar low material loss (~0.03–0.04 wt%).
- Practical Considerations
- The two-step method offers better control over the cleaning process, as cleaning stops when the AgCl layer is consumed, reducing risk of over-cleaning.
- The slurry, while slower, is safer for surface integrity and can also be used to smooth roughened surfaces from other treatments.
Conclusions
- Simple complexing agents alone are insufficient for effective silver tarnish removal under the tested conditions.
- Oxidative DESs can alter tarnish to more soluble compounds, enabling subsequent removal with bio-derived complexing agents.
- The custom sodium glycinate slurry is the most promising greener alternative, offering effective cleaning with minimal surface damage.
- The two-step method, though effective for heavy tarnish, requires optimization to reduce surface roughening.
Recommendations for Future Research
- Optimize DES formulations and application protocols to improve efficiency and surface outcomes.
- Investigate the complexation mechanisms of glycinate with silver ions.
- Explore the slurry’s cleaning mechanisms and enhance its cleaning rate.
- Scale testing to historical objects with complex geometries and aged natural tarnish.
This study contributes to the development of sustainable conservation practices by demonstrating viable greener alternatives for silver cleaning, aligning with global trends toward eco-friendly materials in cultural heritage preservation.
| REFERENCE: Qing Wu, Jack Harrison, Patrycja Janina Petrasz, Lidia Mathys, Edith Joseph, A preliminary study of using greener materials including deep eutectic solvents (DESs) for the cleaning of silver tarnish, Journal of Cultural Heritage, Volume 76, 2025, Pages 126-135, ISSN 1296-2074, https://doi.org/10.1016/j.culher.2025.08.002. (https://www.sciencedirect.com/science/article/pii/S1296207425001852) |
Cleaning Efficacy and Apical Pressure in Sonically-Activated Irrigation Systems: Impact of Tip Vertical Stroke
Objective
This study investigates the cleaning efficacy and periapical pressure generation of sonically-activated irrigation (SAI) systems, specifically comparing two generations of EndoActivator devices and examining how the number of vertical tip strokes affects both debris/smear layer removal and safety (apical pressure) during root canal irrigation.
Key Findings
- Second-Generation Device Outperforms Predecessor
- The SmartLite Pro EndoActivator (SAI-2) , operating at 18,000 cycles/min with paddle-shaped tips in elliptical motion, demonstrated significantly better smear layer removal across all root canal thirds compared to the first-generation EndoActivator (SAI-1) and conventional syringe irrigation (SI).
- Both SAI devices removed debris more effectively than SI, but showed comparable debris removal to each other.
- Vertical Strokes Improve Cleaning but Increase Risk
- Increasing the number of vertical strokes from 0 to 10 or 40 significantly improved debris removal in all root regions.
- Smear layer removal improved with more strokes, particularly in the coronal third for the 40-stroke group and apical third for the 10-stroke group.
- However, 10 strokes were generally sufficient to achieve adequate cleaning, with no significant difference between 10- and 40-stroke groups in most regions.
- Apical Pressure Increases with Stroke Count
- Periapical pressure measurements in simulated root canals showed:
- 40 strokes generated significantly higher apical pressure (exceeding the human central venous pressure threshold of 0.76 kPa) than 0 or 10 strokes.
- No significant difference in pressure between 0- and 10-stroke groups.
- This indicates that excessive vertical strokes increase the risk of irrigant extrusion into periapical tissues, which can cause postoperative pain or tissue damage.
- Regional Differences in Cleaning Efficacy
- Cleaning was most effective in the coronal third, where greater space allows better irrigant circulation and tip oscillation.
- The apical third showed less effective cleaning due to confined space and increased tip-wall contact limiting fluid dynamics—consistent with findings from other irrigation studies.
Conclusions
- SmartLite Pro EndoActivator is more effective than both the original EndoActivator and syringe irrigation for smear layer removal.
- Ten vertical strokes provide optimal balance between cleaning efficacy and safety:
- Achieves significant debris and smear layer removal
- Does not generate dangerously high apical pressures
- Forty strokes, while slightly more effective in some regions, significantly increase extrusion risk and should be avoided in clinical practice.
- The null hypotheses—that cleaning efficacy and pressure do not differ between groups—are rejected.
Clinical Implications
- Clinicians using sonic irrigation should limit vertical strokes to approximately 10 per irrigation cycle to maximize safety while maintaining efficacy.
- The SmartLite Pro EndoActivator represents a meaningful advancement over first-generation sonic devices for smear layer management.
- Excessive agitation (≥40 strokes) provides marginal cleaning benefits at the cost of potentially hazardous apical pressure increases.
Limitations and Future Research
- Study used straight canals only; curved canals may show different results.
- Age variability in tooth samples may affect dentin properties.
- Apical pressure measurements used distilled water (not NaOCl) to protect equipment; viscosities are similar but future studies should use corrosion-resistant models with NaOCl.
- Further research should:
- Visualize oscillatory amplitude and fluid dynamics during activation
- Investigate effects in curved root canals
- Correlate pressure measurements with clinical outcomes
This study provides evidence-based guidance for optimizing sonic irrigation protocols, balancing cleaning efficacy with patient safety in endodontic treatment.
| REFERENCE: Phu Yadanar Aung Myint, Satoshi Watanabe, Yanyan Chen, Ryuma Saito, Takashi Okiji, Cleaning efficacy and apical pressure in sonically-activated irrigation systems: Impact of tip vertical stroke, Journal of Dental Sciences, Volume 20, Issue 3, 2025, Pages 1571-1578, ISSN 1991-7902, https://doi.org/10.1016/j.jds.2024.12.003. (https://www.sciencedirect.com/science/article/pii/S1991790224004094) |
A Method for Cleaning Flat Punch Diamond Microprobe Tips
Background & Problem Statement
Diamond microprobe tips used for in-situ micromechanical testing inside scanning electron microscopes (SEMs) inevitably accumulate surface deposits during use. These contaminants alter the probe’s effective geometry and surface properties, compromising measurement accuracy and reproducibility. Existing cleaning methods—such as indenting soft materials, wet cleaning with solvents, oxygen plasma treatment, or CO₂ snow cleaning—prove inadequate or risky for flat punch tips mounted on fragile MEMS-based force sensors.
Objective
To develop a reliable, non-damaging method for cleaning flat punch diamond microprobe tips within an SEM environment.
Methodology & Key Findings
- Conventional approaches tested and found ineffective:
- Indenting soft materials (copper tape, pure iron, carbon adhesive tape) failed to remove deposits.
- Isopropanol applied to cleanroom wipes produced no improvement.
- Two custom microfabricated brushes—silica needles and cementite lamellae—were unable to dislodge the strongly adherent, hard deposit.
- Successful cleaning method developed:
- A straight, sharp ridge was milled into a silicon wafer using focused ion beam (FIB) technology.
- The contaminated diamond flat punch was carefully aligned and scraped against this ridge within the SEM.
- Continuous force monitoring ensured safe, controlled removal without damaging the delicate MEMS sensor.
- Complete cleaning was achieved, restoring the tip to its pristine condition.
Critical Success Factors
- Precise alignment between the ridge and the flat punch surface is essential; tilting prevents effective scraping.
- The silicon ridge must be harder than the deposit but softer than the diamond tip to avoid probe damage.
- Real-time force monitoring protects the sensitive microforce sensor.
Conclusions & Recommendations
This method provides a rapid, repeatable, and safe solution for cleaning flat punch diamond tips directly within an SEM. It is particularly suited for MEMS-based microforce sensors where manual or plasma cleaning is impractical. With careful alignment and load control, the technique can be routinely applied to maintain tip cleanliness and ensure reliable micromechanical test data.
Implication: The study fills a critical gap in micromechanical testing methodology, offering researchers a practical tool to preserve probe integrity and measurement accuracy over extended use.
| REFERENCE: Joris Everaerts, Alejandra Slagter, Andreas Mortensen, A method for cleaning flat punch diamond microprobe tips, Micron, Volume 155, 2022, 103217, ISSN 0968-4328, https://doi.org/10.1016/j.micron.2022.103217. (https://www.sciencedirect.com/science/article/pii/S0968432822000130) |